Step 1 – Download & Installation
Navigate to trade-ideas.com/download/ and from there click on the “Download Trade Ideas” button. Save the file on your local computer and run it on your computer to install the software. The Beta version will include the latest features.
Step 2 – Startup & Login
After starting the program, login with your credentials and the status bar will become green. Sometimes you might have a blocked connection because of a firewall or antivirus. In cases like this, go to Tools>Options>Connection and change connection type to “New HTTPS Mode”.
To quickly get started, go to New>Docked Channel Bar
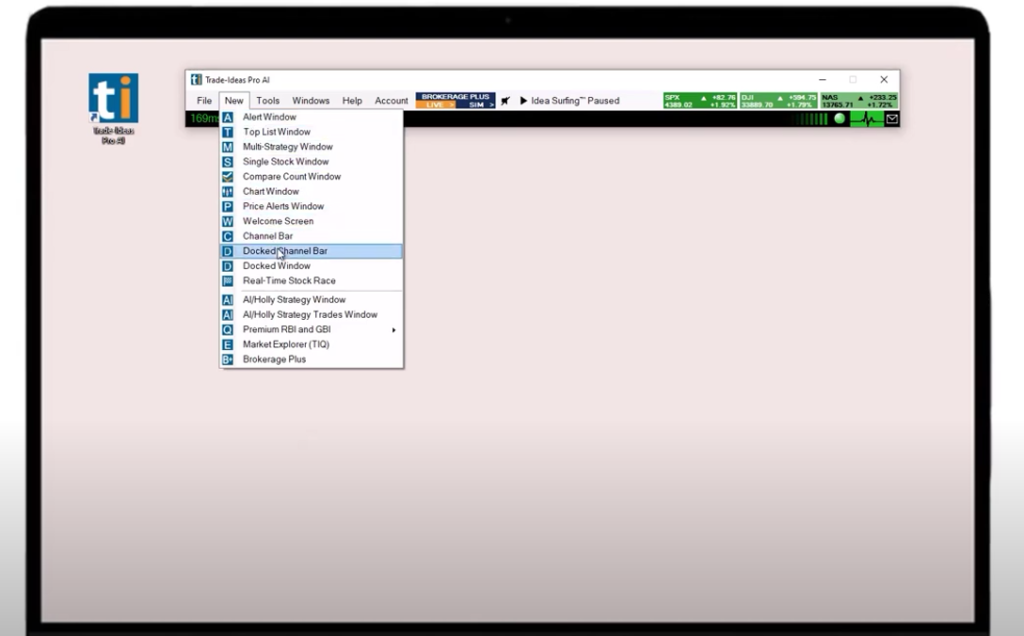
You will then get a display of trading templates that are ideal for new users.
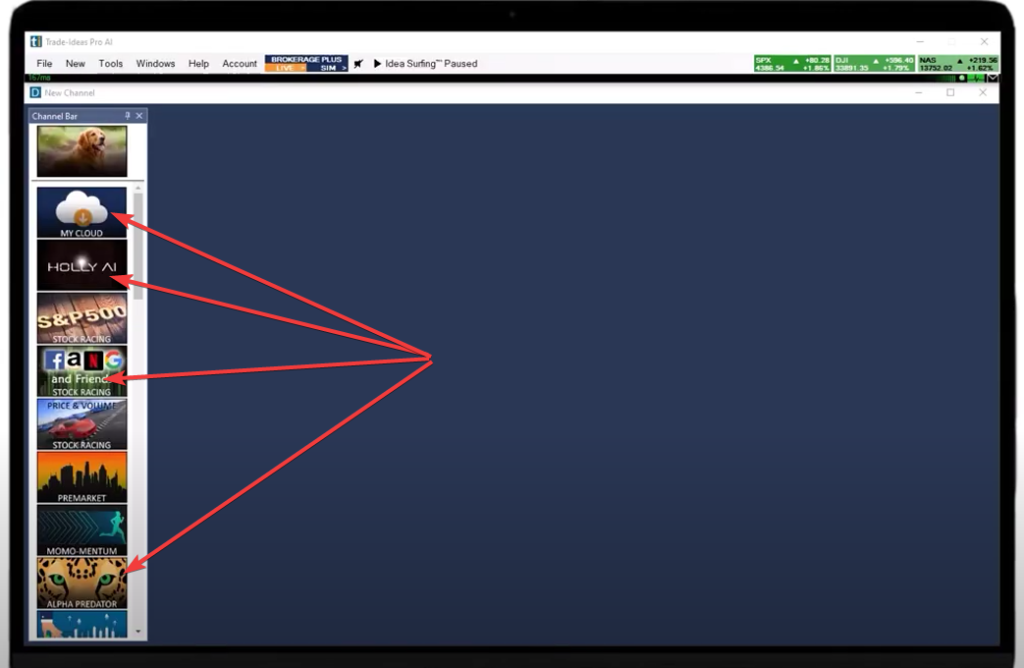
Browse through the different options at your disposal to see which one best suit your trading style.
Once one selected, you will usually get an array of windows that range from charts, top lists, stock races, etc.
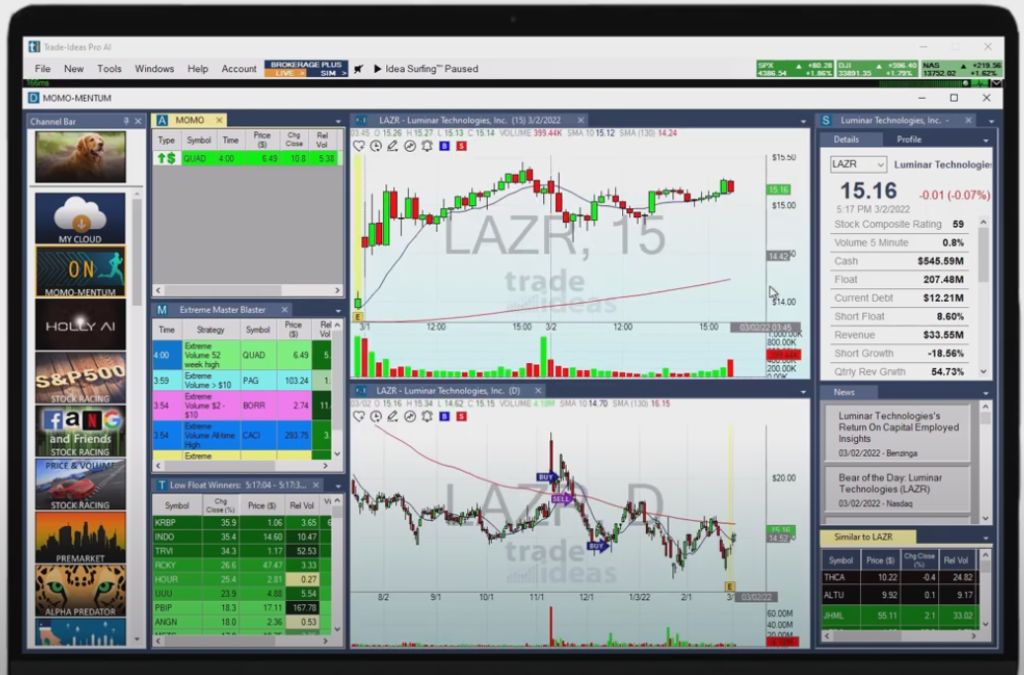
From here you can arrange the windows or remove them to tailor it to your needs.
Once you have the arrangement you like, make sure to save the layout by going to File>Save or Share to Cloud Layout in order to retain the changes for when you open the program again.
Next, select all menu items that you’d like to save and give your personal template a name.
In order to load the template, you’ll need to go to File>Load from Cloud to retrieve your template.
Step 3 – How to Use the Toolbar & Your Handy Right-Click
The toolbar is the master widget that controls all windows under Trade Ideas. If you minimize it, then all other windows will minimize as well. If you want to add a particular window, you’ll need to go to the toolbar and click New>then choose the window you want.
The tools tab provides various personalization options such as font, time settings, and language. You can also create custom scans and link various windows together.
Your handy Right-Click – all windows inside Trade Ideas are right clickable and will display their own features and settings. You can add indicators, change color of different items and more.
Step 4 – How to Choose Layout Styles
You can choose from 3 layout style options. The first options is the “free floating windows” where each window can move from one place to another independently from other windows. The second option is “dock”, meaning all windows are contained within a master window. The third option is to create a layout that is a combination of the first 2 options. Most users take their time to adjust the layout to their particular trading style.
To choose your layout go to the menu and click Tools>Options>Layouts
To change any window from free floating to dock and vice versa, you’d only need to right click that particular window and initiate “Duplicate into (your style of choice).
To do more testing on your own, we recommend that you play around with the layout options with the channel bar since it’s a highly used feature for a lot of traders.
Once you are satisfied with the layout of your choosing and want to save your layout, simply go to File>Save or Share to Cloud, and choose a name. Then you can load your new layout at any time.
Step 5 – Build Your Own Stock Scanner
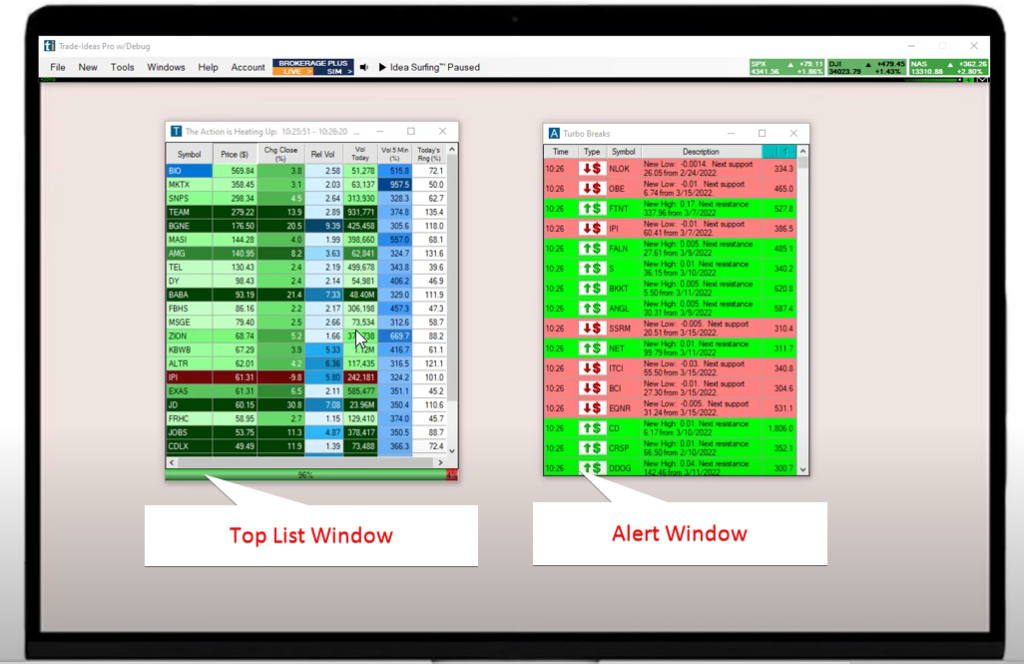
There are 2 different windows when it comes to building a scanner, Top List Window and Alert Window
Both windows will scan the market according to your filters. To choose your filters, right click on the scanner window of choice and hit “configure”. From here, you can choose from a range of options such as RSI, ATR, volume, VWAP, volatility, short float, and hundreds of other possibilities to find the stocks you’re looking for.
How do filters work? All filters work as an “AND” function which means that stocks need to meet all filters at once to show up on your scan.
In the summary tab of the config window, you can see all the criteria you’ve set.
What is the difference between Top List Window and Alert Window in Trade Ideas?
- Top List Window rank the found stocks in a ranking of your choosing, for example by volume, and will update as time passes.
- Alert Window shows the latest action with a time stamp without any rankings. For example, a new high gets triggered because your filters and it will display as so at a certain time.
- Alert Window work as an “OR” function which means that if any of your filters are met, then it will trigger an action alert.
- Alert Window also has sound to notify you while Top List Window won’t.
How to Build a Top List Window Scan in Trade Ideas?
To begin, go to the toolbar and click New>Top List Window. The configuration menu will then pop up for you to create your own customization.
Notice that the Strategies Tab comes with a range of pre-built scans so that you won’t have to build everything from scratch. There are over 500 alerts and filters to choose from. If you would like to use any one of them, double click on a scan of choice and click Ok and the scan will load instantly.
To build your own scan, go to the Search Tab to find the criteria you need. Once you have chosen a criterion such as Price for example, then you will be taken to the next stage, Windows Specific Filters Tab. In this tab, you can enter in the criteria such as $10 minimum and $100 maximum.
To add another filter for the scan, simply go back to the Search Tab, and add another filter such as volume.
If at any time you need further details about a filter, simply right click on the element in question and click “help” or click on the magnifying glass.
You can exclude certain results from certain exchanges such as Pink Sheets or Warrants in the Exchanges Tab and the Symbol Lists Tab.
Next, go to the Columns Tab and choose what information you want to show up in the Top List Window results. Examples include: price, % change, gap %, average daily volume, etc.
Lastly, go the Sorts Tab and choose how you want to rank the scan results to show which to be the top.
To double check to see if the scan is doing what you want it to do, go to the Summary Tab and review the settings. Once you are satisfied, remember to name your new scan and save it into the cloud by right-clicking your new scan and select “Save or Share to Cloud”.
How to Build an Alert Window Scan in Trade Ideas?
To begin, go to the toolbar and click New>Alert Window.
From here, you will see a familiar setup as with the Top List Window and you will see a range of pre-built scans available to you.
To create your own scan, go to the Strategies Tab in the config window and double click Start From Scratch. Next, go to the Search Tab to find the criteria you desire. You’d go through the same steps as described in Top List Window scanner build your custom scan. It is important to mention again that you need to save the scan into the cloud so you can retrieve it at a later time.
To change the sound alert setting, simply right click on the new alert window and select Properties>Actions. From here you can choose a range of sounds to use at your disposal. One feature that some traders like is the robot call out of each stock that hits the scan.
Step 6 – Set Up Your Charts
To get started, navigate to the toolbar and click on New>Chart Window.
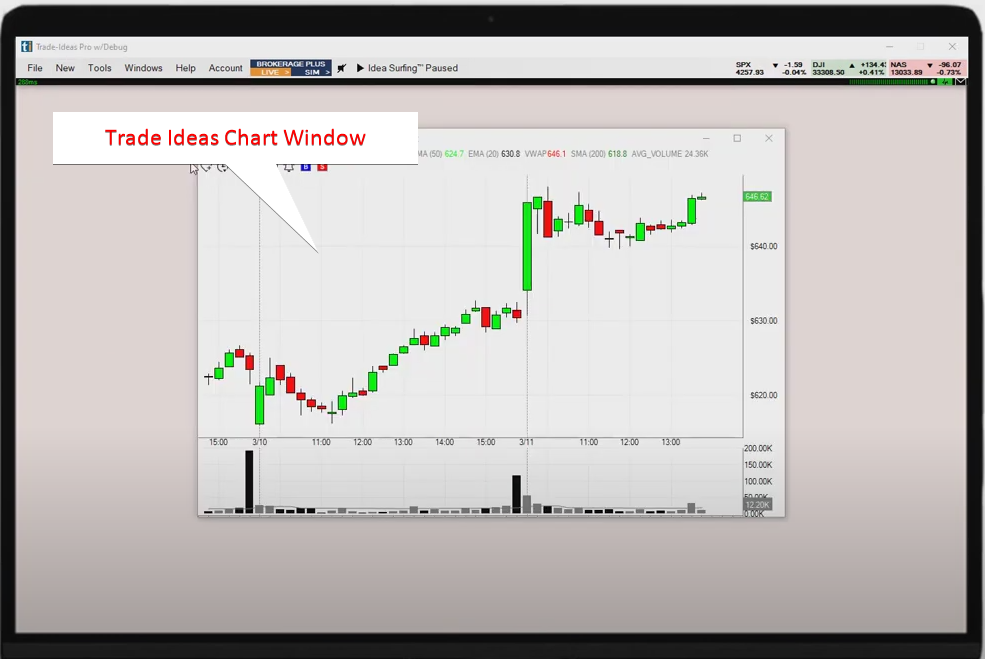
To change the symbol on a chart, simply click into the chart window and start typing it. You can input the company name as well.
To view the history of the charts you’ve looked at, use the scroll wheel on your mouse or use the left and right arrow keys on your keyboard.
To zoom in and out of the chart, click and hold the CTRL key + Scroll Wheel or CTRL key + left and right arrow keys.
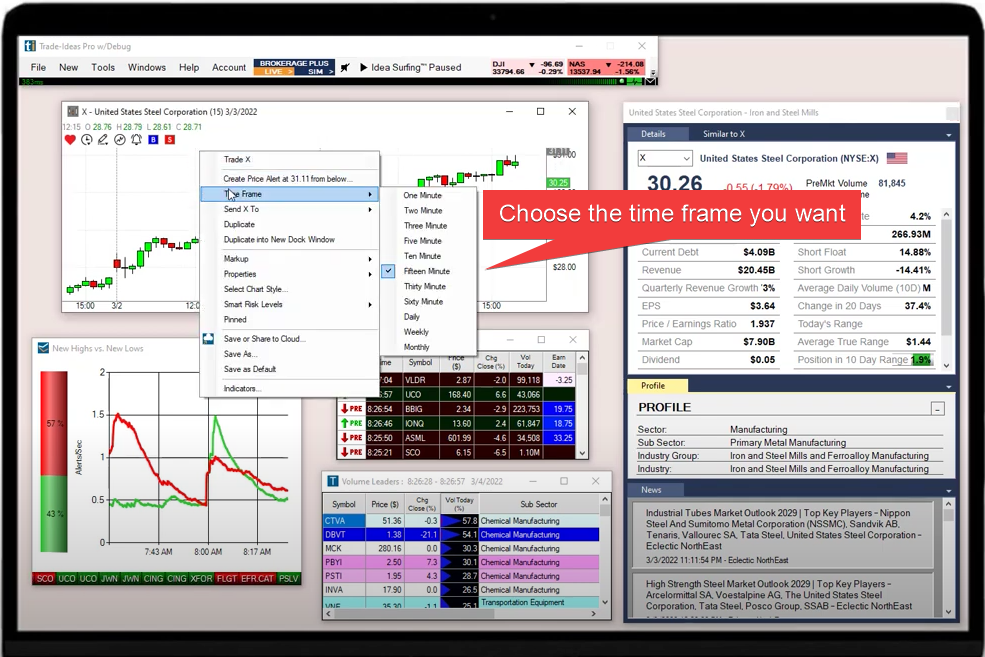
To change the time frame of the chart, right click on the window and select Time Frame. The options range from 1 minute to monthly. From this setting menu, you can also choose to add various indicators and drawings on the chart.
To change the type of chart from candlestick, to bar or line, or area charts, simply do so after right clicking the chart window and select Chart Styles. You can also change the colors to your specific needs.
To set price alerts, you can set that up within the chart window after right clicking once again and select Create Price Alert then choose your settings. In addition, if you have your brokerage connected to Trade Ideas software, then you can place trades right on the chart itself.
Another useful feature on charts is to link them with the scanners you’ve set up. To do this, go to the menu after right clicking the window and select Symbol Linking. Next, choose the color you’d like to link. If you had chosen green for the scanner then you would need to go to the chart window and also select green for it to link. After linking by color, you will be able to click on any symbol on the scanner and the corresponding chart window will update to the symbol that was last clicked.
Are You Feeling Overwhelmed? Don’t Worry
Trade Ideas is a power tool for any trader. There are endless ways to customize the set up that works for you. Learn to use each feature at your own comfortable pace and eventually Trade Ideas may become an indispensable tool in your trading success.
Happy Trading Happy Banking,
Tradethischart